How to Build a PBX (Quick Setup)

If you a do-it-youself type, and you are looking to learn/build phone systems you should checkout how to become a Ringroost Do-It-Yourselfer.
Building your own business phone system does not have to be an expensive project or technical nightmare only to be conquered by the most experienced professionals. Working with RingRoost's drag and drop phone system builder, anyone who knows how to boot up a computer can now set up their own phone system for their office or even home.
In this step by step guide I will show you how to setup a 3 line office phone system for your own company. The phone system we are going to setup has three phones each with their own ten digit phone number (accessible by anyone) and each with their own extensions. When one of three phones wants to dial another they simply dial the extension and are connected, if they want to dial out they simply dial the 10 digit phone number they want to reach and they are connected. One phone (considered the "main company phone") in the system has an interactive voice response menu that prompts anyone that calls it to dial 1 ,2 or 3 and then connected them to their desired extension. The main phone is also E911 capable, which is required for most office/small business and home phone systems in the USA.
This video shows the whole process, you can watch the video and/or follow the steps below to setup your own PBX.
To give you a rough idea of what this will cost: I bought the three phones a total of $120 ($40 a piece), as far as service I have only used $8.50 of RingRoost's credits after 3 months of making and taking calls on my three line phone system.
Step 1 - Get the right VOIP phone(s)
To get started you will need to acquire a few VOIP phones (meaning they support SIP). I would recommend the Grandstream gxp1400 . It's a great phone and you should be able to find one for under 50 bucks. If you need a wireless phone (ie: where you want your phone setup is not near a ethernet line) then I would go with the Panasonic KXTGP500B04 (it's pricier, but all wireless phones are).
Step 2 - Get a Phone number and create a new phone system
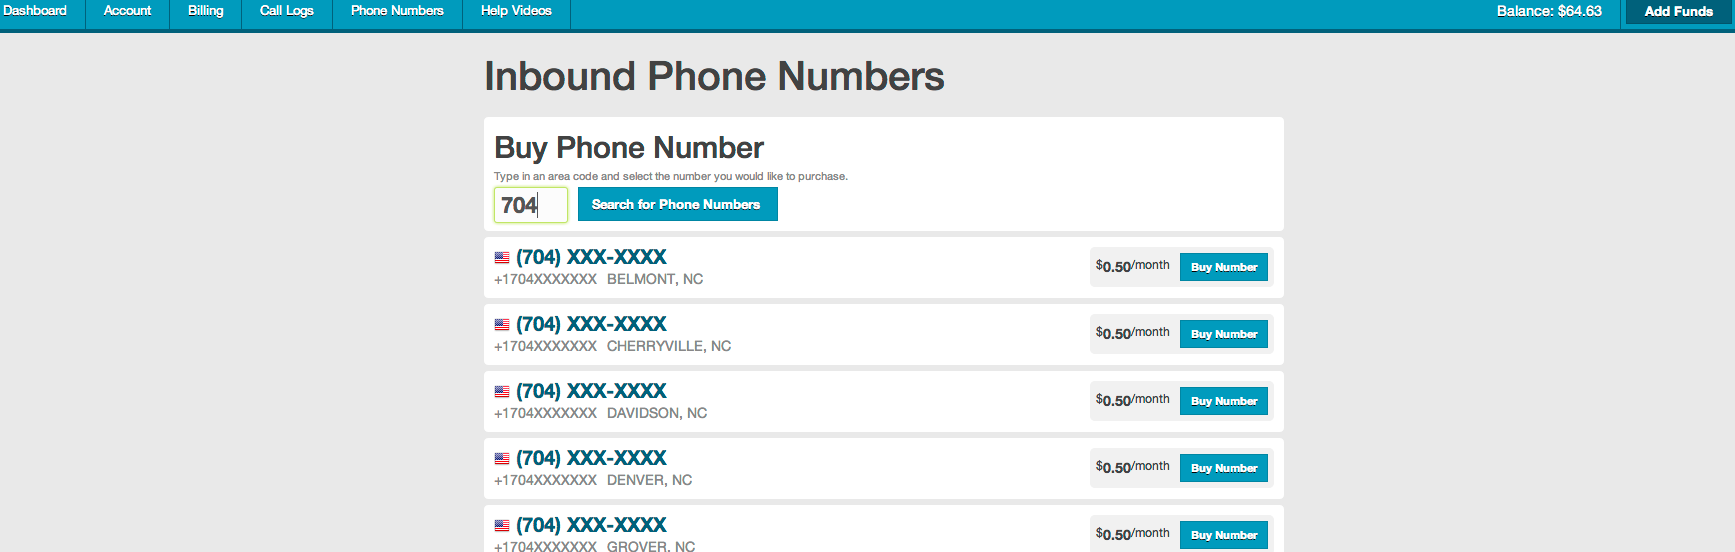
After you have your phones you have gotten the hardest part out of the way. Now we just need to leverage RingRoost's drag and drop builder to set up our phone system. If you don't already have an account with them you can sign up hereAfter you signup you will need to get three phones number (or more or less depending on how many phones you want to setup). Buying a number is simple, in your RingRoost account under "Phone Numbers" click "Add Phone Number" and then search for your area code and select the number you want. Numbers are really cheap with RingRoost (under $1/mo for most numbers.) Here is example of buying numbers: (Google voice customers see here on how to setup an auto attendant)
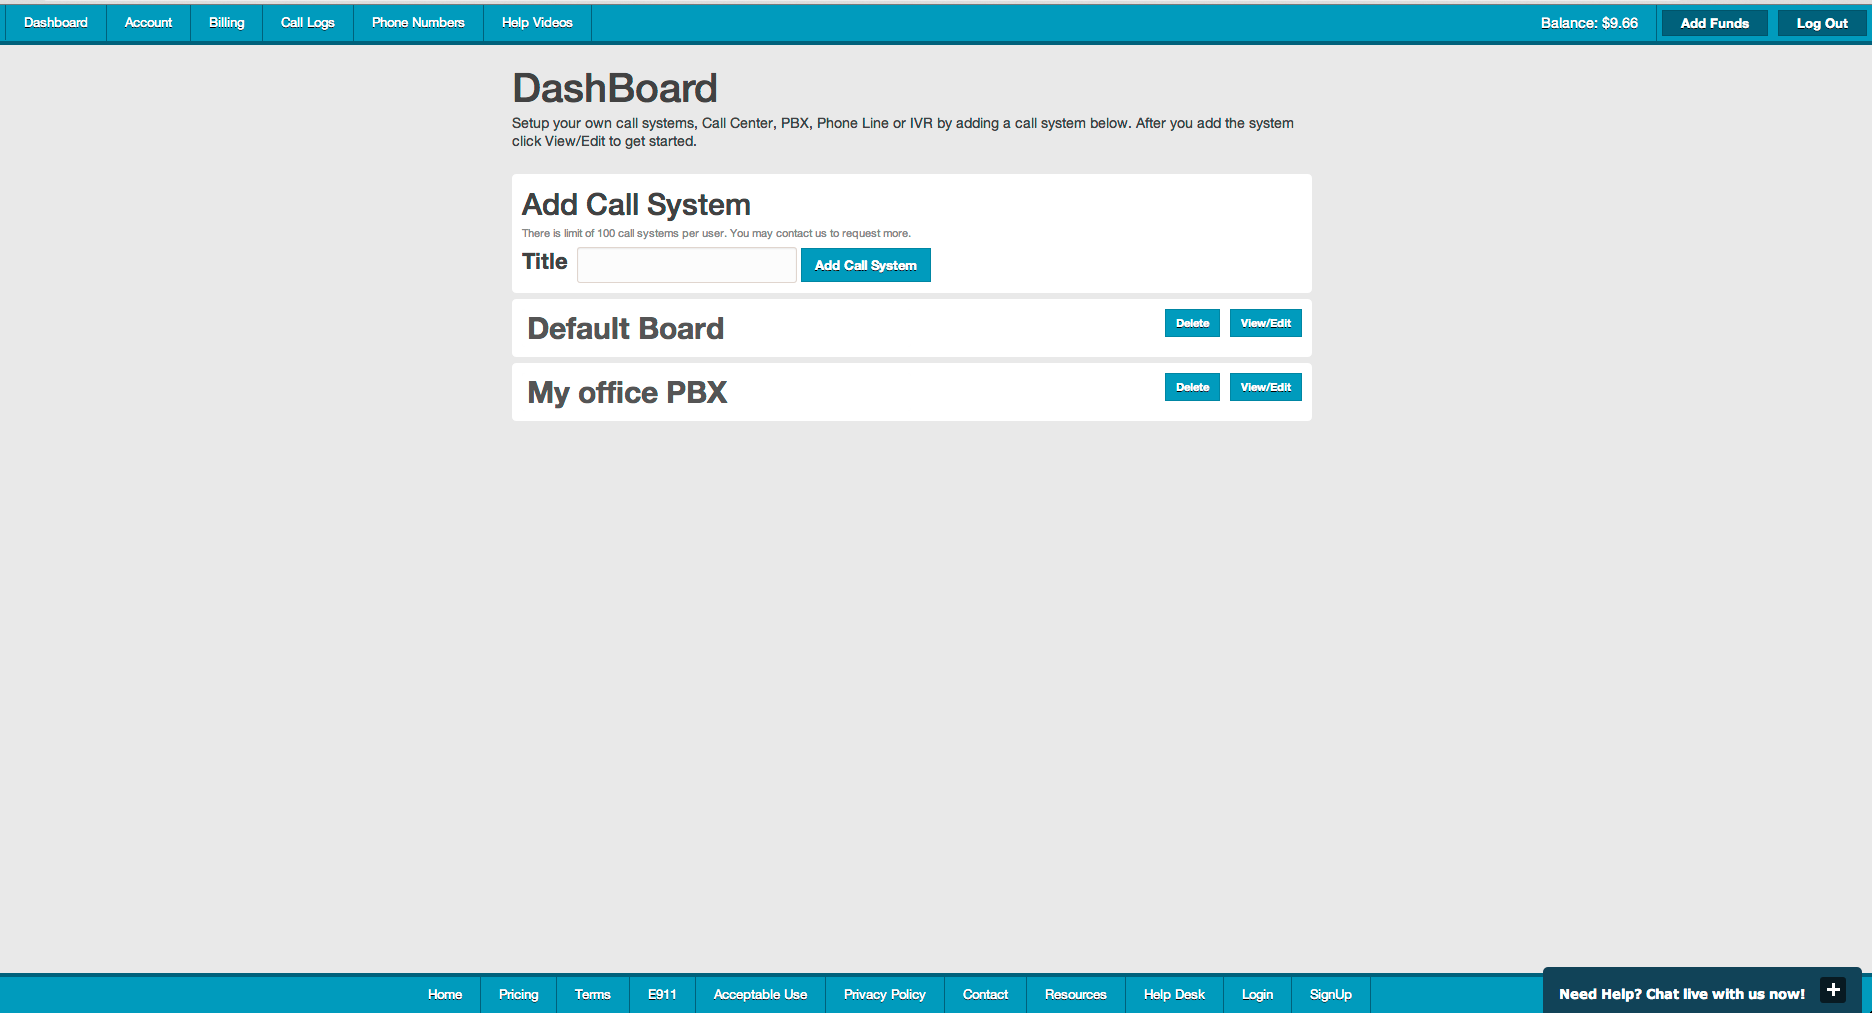
After you have your three numbers, go to your dashboard and add a new call system names "My office PBX", after adding it click "View/Edit" and you will be taken into the Phone system builder.
Adding a new phone system
Step 3 - Add an inbound phone and Voip Phone
RingRoost's PBX system builder allows us to build out our phone system by dragging and dropping various elements (left navigation) on the diagram and then connecting the elements together. FYI: It's a live system, so the he second we click "Save" our phone system will be functioning and ready to use.There are a number of elements, but for now the only only two we need to worry about are the "Inbound Phone Element" and the "Voip Phone Element". The inbound phone element is the element that handles an incoming call when one of you numbers is dialed - it's effectively the "starting point". We will start by dragging a "Inbound Phone Element" on the board and then selecting any one of the three phone numbers in the dropdown that appears:
Next we need to connect the "Inbound Phone" to a "Voip Phone" element. This simply means that when anyone dials the inbound phone number that call will be sent to the "Voip Phone" and that phone will ring. Go ahead and drag and drop a "Voip Phone Element" on the diagram and connect the two elements. Set the "Voip Phone Element" extension to 1. Finally save your phone system by clicking "Save" in the top right.
Your phone system diagram should now look like this:
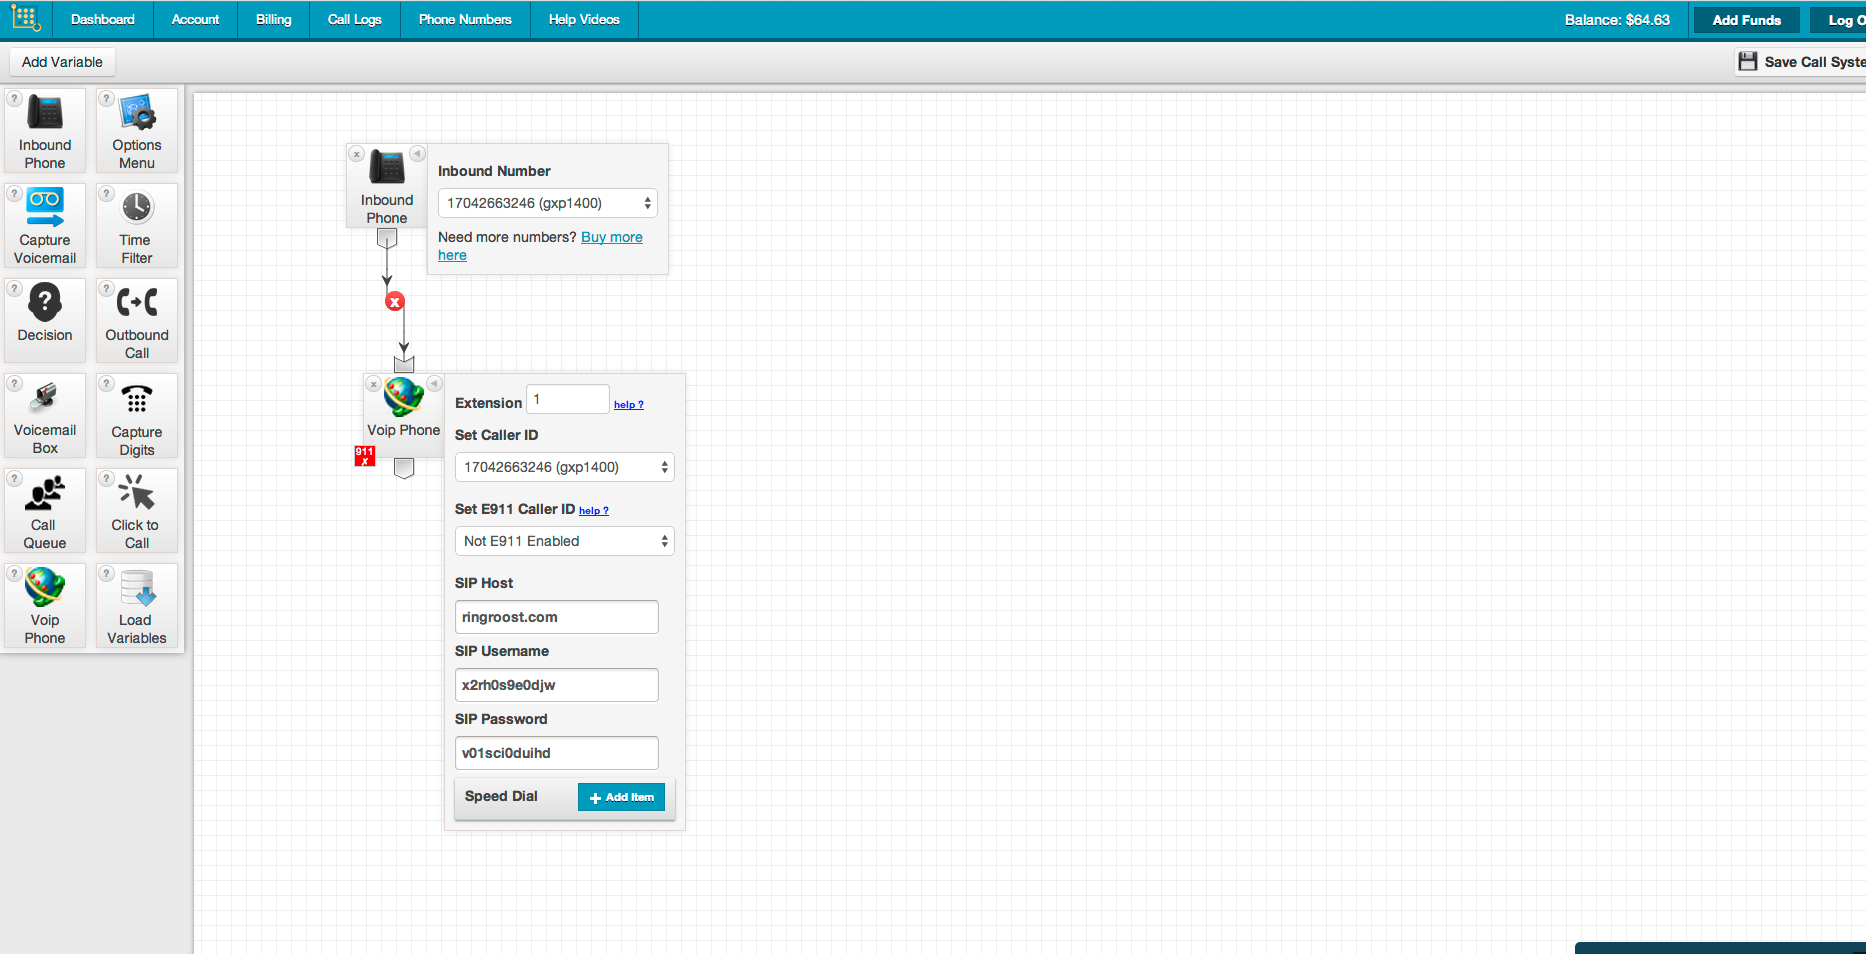
Step 4 - Register your physcial phone with RingRoost
Now for the only slightly tricky part. We need to register our physical Voip phone with RingRoost's "Voip Phone Element". Inside the element you will see a SIP Host, SIP Username and SIP Password. Those are the only three things you need to register your physical phone. Every physical VOIP phone will have a way to enter SIP credentials (hostname,username,password), but how this is done changes from phone to phone. Below is a quick video on how to register your phone with RingRoost for the Grandstream GXP1400. Even if you are using a different phone the process should be very similar. If you are having trouble with the step try chatting with the RingRoost support - they will be able to help you out in no time at all.After your phone is registered you should be able to make and receive calls, so go ahead and give a friend a call on your new phone and then have someone call your number just to make sure everything is working properly. Congrats you have just setup your first phone line, now for the other two.
The process is exactly the same for the other two phones lines, except when you add the "Voip Phone" Element to the board use the number 2 and 3 for their extensions. After setting these phones up, make test calls out and in for both the phones. Generally you want to set the "Outbound" caller ID as the same number that rings the phone when it's called.Note: if you want you can set all the outbound caller ID's to the same number, this way people you call will only see one number no matter what phone from your company calls them.
You phone system should now look like this:

You will notice that you can pick up any of the three phones and dial 1,2 or 3 and the appropriate phone will ring and be connected. This is a known as an "Internal Call" and it does not cost anything to place this type of call, this can be especially nice for a business that has multiple offices in various locations.
Step 5 - Add an IVR prompt to your PBX (optional step)
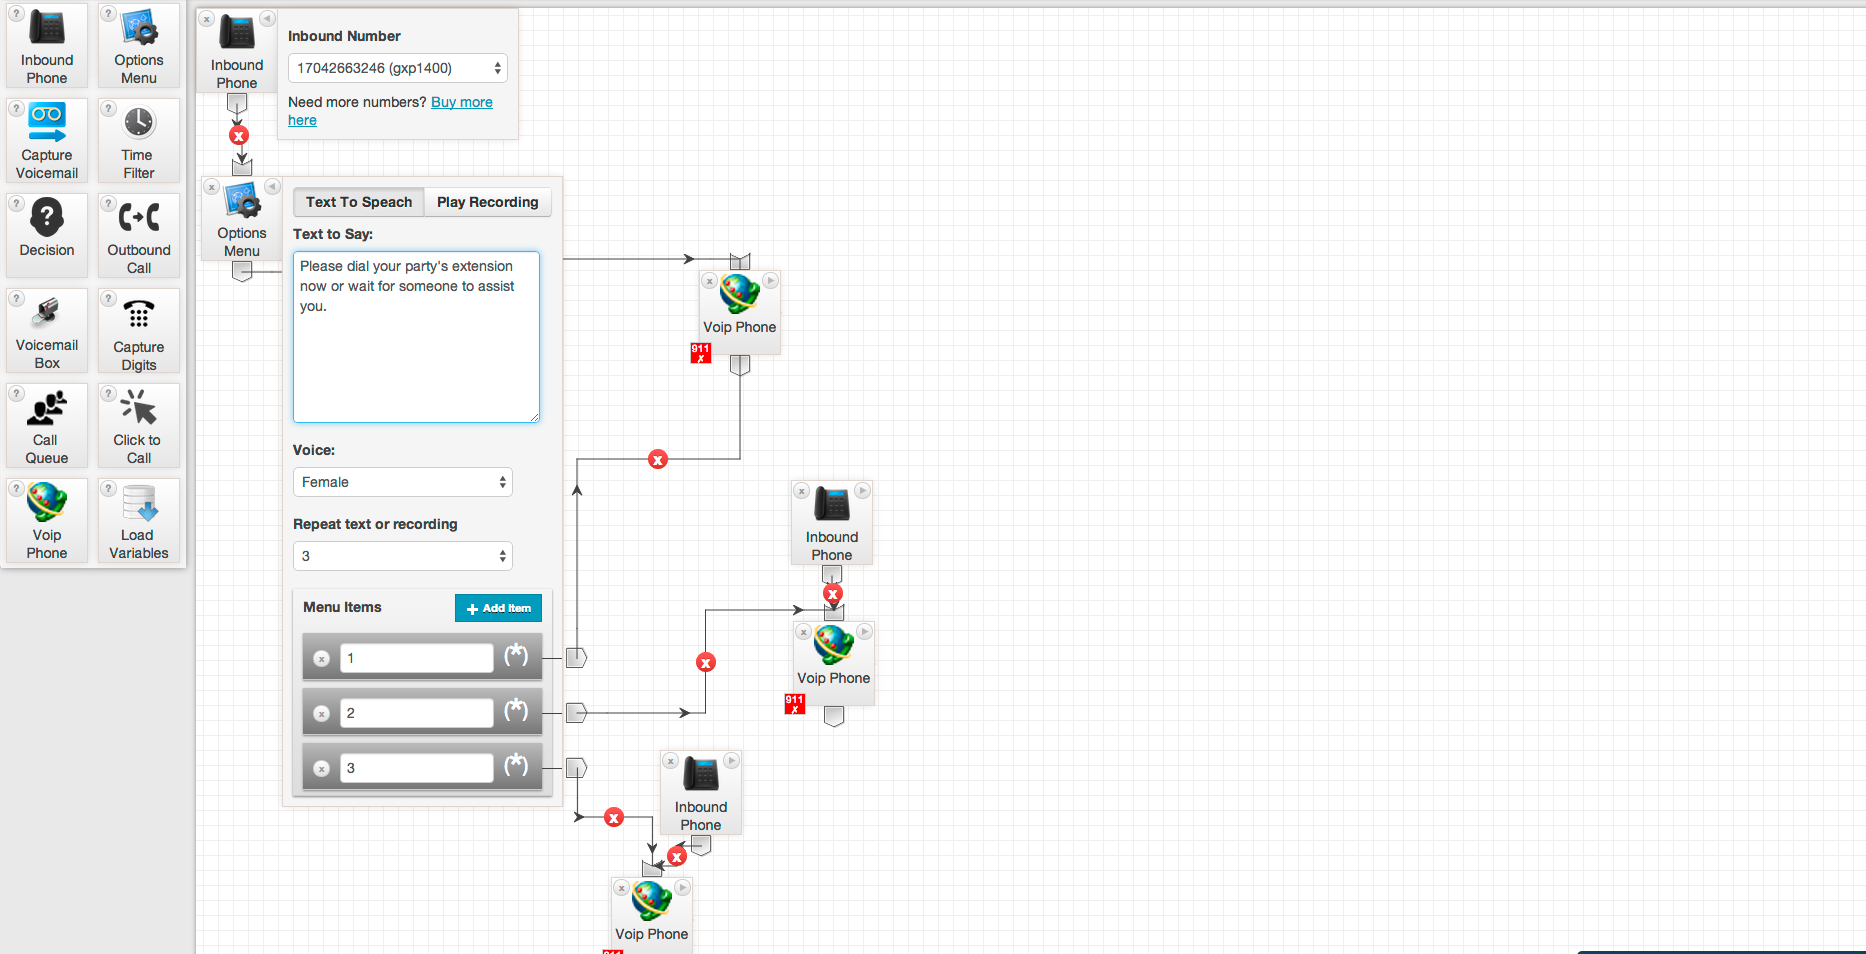
Now to have a little fun we can setup a interactive voice response (IVR) prompt for one of the phone numbers. Our prompt will simply ask the user to enter their party's extension, if they don't enter an extension they will fall through and ring the main phone, otherwise we will forward them to whatever phone extension then entered.To set up an IVR we need to use a "Options Menu Element" - go ahead and drag and drop ones of these elements onto your phone system. Remove the connectors between one of you "Voip Phones" and "Inbound Phones" and add a the "Options Menu" in the middle. Type some text inside the options menu: Hi and thanks for calling our company. Please dial your party's extension now or wait for someone to assist you.
Now on you're Options Menu click "Add Item" three times and enter 1,2,3 in each "Menu Item" field. Then connect each "Menu Item" with the phone of the appropriate extension. Then save your phone system. Now whenever someone calls your "main" phone line they will be prompted to dial an extension of wait for the default phone to ring .Pretty cool huh! Go ahead and test it out.
After adding IVR your phone system should look like this.
Step 6 - Enable E911 calls
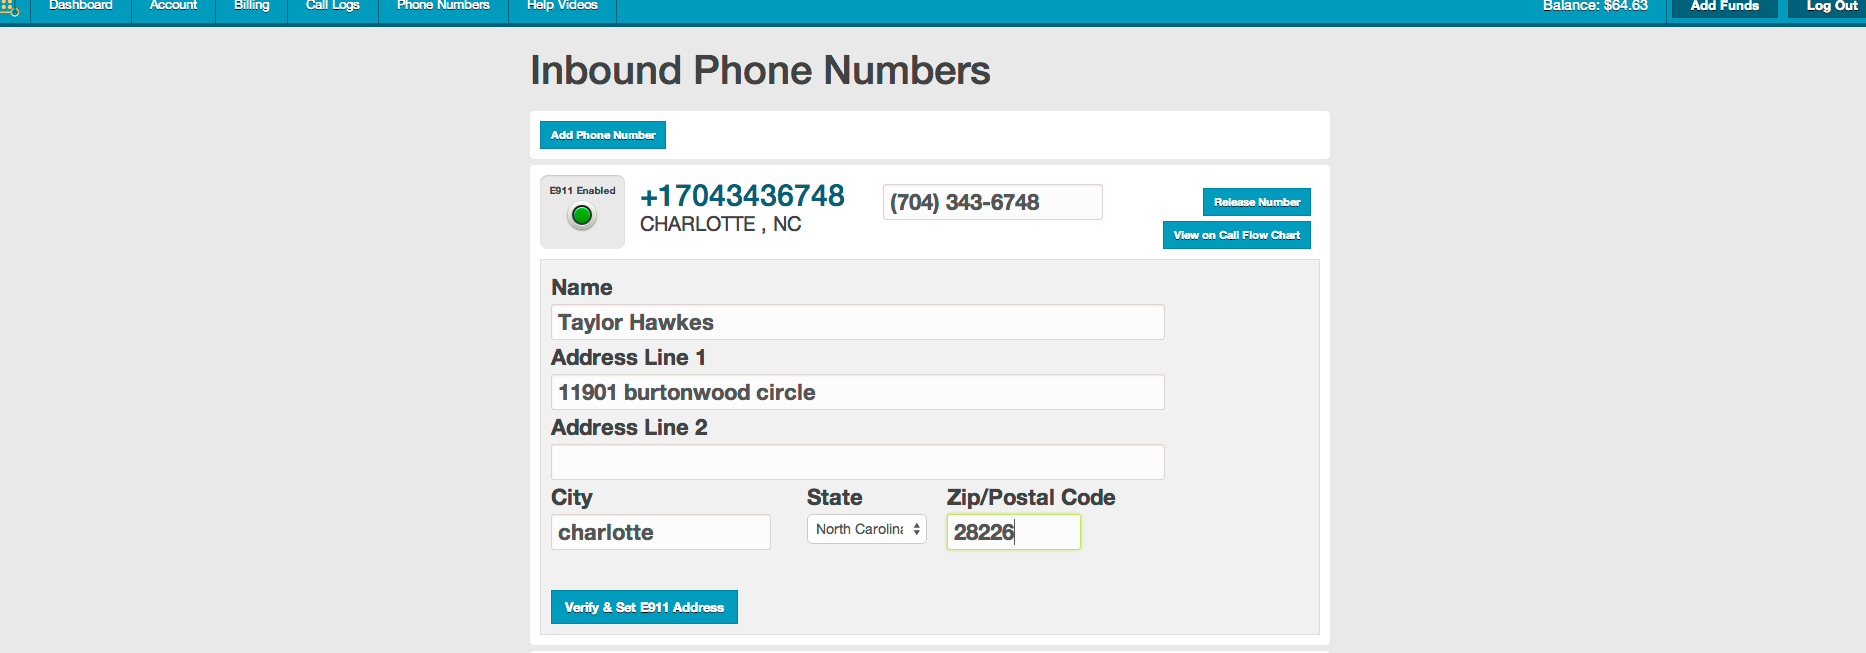
Most states in the USA require that at least one phone in each physical location of a phone system is able to make E911 calls. In this system we will set up one of our phone number to be E911 enabled, all three phones will then use the E911 enabled number to call emergency services.Under the "Phone Numbers" section of your RingRoost account click "enable E911" on one of your phone numbers (just not the number that has the IVR) and then enter your physical address and "Verify & Save Address".
Note: make sure you don't use the number that sends the user into a voice prompt, emergency services need to be able to call you don't want to make them go through a voice prompt to reach you.
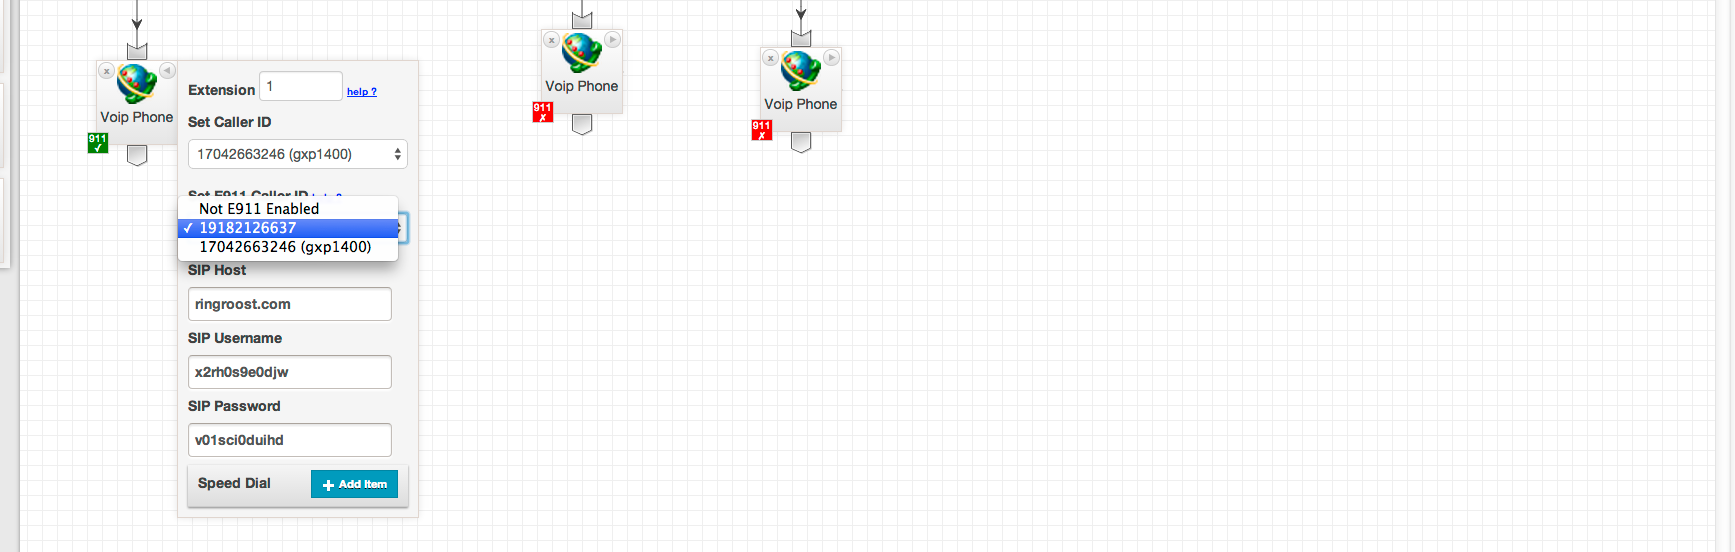
Go back to your flowchart and for all three "Voip Phones" change the E911 caller ID to the E911 enabled number. Save your phone system and you should see the elements 911 indicator turn green. To ensure that our E911 service is working properly dial 933, you should hear a voice prompt that reads you your address and says you are setup ok. (NOTE: DO NOT DIAL 911 FOR TESTING PURPOSES).
Adding E911 Address to your phone number
Enabling E911 on Voip Phone
Congratulations at this point you have setup your own very own PBX. There is a lot more you can do with RingRoost's phone system - setting up a PBX is just the tip of the iceberg so feel free to play around. Have Fun!!!
- Resources
- User Manual
- Forums
- Help Videos
- Blog
- FAQ's
- Office Phone System Settup
- PBX Setup
- SIP Phone System