Asterisk AMI – Sending MWI (Using SIPnotify)

Sending a SIP MWI (Message Waiting Indicator) using Asterisk AMI is possible, but the syntax is just really confusing (and not documented), after rummaging through the source code for a bit I worked it out.

We need to use the SIPnotify AMI Action. The tricky part is getting the syntax right:

Action: SIPnotify
ActionID: 1231541512
Channel: peername
Variable: Event=message-summary,Content-Type=application/simple-message-summary,Content=Messages-Waiting: yes,Content=Voice-Message:1/3
Notice: That that we need to set the the Variable argument “Content” in order to set the body, furthermore “Content” does not accept newlines “\n” so we have to set more than one “Content” – pretty confusing yes.

Here is a complete example of some PHP code that uses Joshua Hatfield’s very helpful flowAPI Class which makes working with the Asterisk Manager Interface very easy in PHP.

        $username="somesippeerusername";
        $total_messages=5;
        $unheard_messages=2;
   
        $waiting="no";
        if($unheard_messages > 0){                                                                     
            $waiting="yes";                                                                            
        }                                                                                              
    
         $body1="Messages-Waiting: $waiting"; 
         $body2="Voice-Message: $unheard_messages/$total_messages";
    
        $ami=new floAPI();                                                                           
        $params=array(
        "ActionID"=>rand(12,12),
        "Channel"=> $username,
        "Variable"=>"Event=message-summary,Content-Type=application/simple-message-summary,Content=$body1,Content=$body2");
        
       $ami->request("SIPnotify",$params);                                                             
       $ami->close();

Alternative ways of sending MWI

You could use a different SIP messaging program (besides Asterisk) to send a SIP MWI Notify.

Using SipSak
http://www.voip-info.org/wiki/view/Asterisk+Realtime+MWI+Hacks

Using PHPSip
https://code.google.com/p/php-sip/

Just make sure you use the right syntax as specified here.

Note: For most Asterisk setups simply set “mailbox”in sip.conf and asterisk will send MWI behind the scene: see here. This is for those using VM outside of asterisk or have other custom needs.

References:
https://issues.asterisk.org/jira/browse/ASTERISK-13089?jql=text%20~%20%22SIPnotify%22
https://issues.asterisk.org/jira/browse/ASTERISK-23283?jql=text%20~%20%22SIPnotify%22
http://forums.asterisk.org/viewtopic.php?f=1&t=91498&start=0&hilit=SIPnotify
https://wiki.asterisk.org/wiki/display/AST/ManagerAction_SIPnotify

Android studio + PhoneGap + Mac – “Hello World” Android App (From HTML/CSS/Javascript)

Taylor Hawkes

Author:

Created: May 20 , 2015


Below I explain how to get set up and run a “Hello World” Android application using Android Studio and PhoneGap. The process goes like this: First will write a HTML/CSS/Javascript, then we will use PhoneGap to convert that html app into a Java/Android app, then we will use Android Studio to compile and run the Java/Android app in simulator, finally I will show how to use Android studio to push your app to an actual Android Device.

FYI: I’ve long suspected that the “developer hubris” of certain technology players (Apple/Google) has unintentionally obfuscated the “getting started” process for new developers. I’ll do my best to overcome this, and explain the process in a incredibly gentle & easy to follow manor.


Installing Android Studio (And Android SDK)

Android studio helps us with a lot, we will use Android Studio to: Install Android Libraries (also know as SDK), Run the android emulator, push our app to a android device.

Note: You may see other tutorials using Eclipse (with the android plugin) – this is an outdated way of doing things, and is going to cause you some serious headaches.

a.) Download Android studio from: http://developer.android.com/sdk/index.html
b.) Run the .dmg and walk through installation (leave all the default settings, & accepts the licenses etc…)
c.) Open Android Studio and create a w project (just use default project settings – we won’t even use this)

Download and install PhoneGap

1. Installing Node.js & Apache Ant (PhoneGap Dependencies)

brew update
brew install node
brew install ant
note: If you don’t have brew you can download it from: http://brew.sh/, or you could just install node.js directly from: http://nodejs.org/download/, and install Apache Ant directly at http://ant.apache.org/manual/install.html.

2. Install PhoneGap

sudo npm install -g phonegap

Creating Our PhoneGap App

We will use PhoneGap to create a default html/css/javascript app.

cd ~/Desktop/
phonegap create helloworld com.world.hello HelloPrettyWorld
cd ~/Desktop/helloworld/

You will now notice a “www” folder in your current directory, this is our default html/css app, we will change this shortly, but we need to do a few more things first.

Next we need to use PhoneGap compile our HTML/CSS/JS app into Java app. This requires just the one tricky step of lettings PhoneGap know where the Android SDK Libraries live. We have already downloaded the SDK, when we downloaded Android Studio, now we just need to know it’s path.

To find your SDK path:

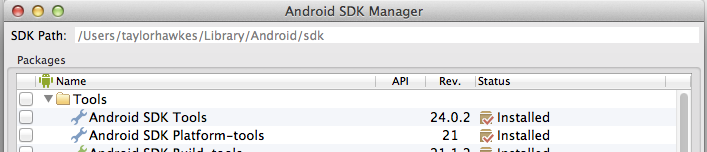
Open Android Studio -> On the Top Bar go to “Tools” -> “Android” -> “SDK Manager”

You should then see your SDK Path, mine is: /Users/taylorhawkes/Library/Android/sdk
Screen Shot 2015-01-13 at 11.38.27 AM

You then need to set the “ANDROID_HOME” variable that PhoneGap Uses, run the below command (CHANGE TO YOUR PATH, NOT MINE):

export ANDROID_HOME=/Users/taylorhawkes/Library/Android/sdk
export PATH=${PATH}:$ANDROID_HOME/tools:$ANDROID_HOME/platform-tools

To permanently add this variable, append the above command to your “~/.bash_profile” file.

Now Under the Android Studio SDK Manager, select version 19 of the SDK build tools Android 4.4.2(API 19) and install the packages.

Screen Shot 2015-01-13 at 12.04.19 PM

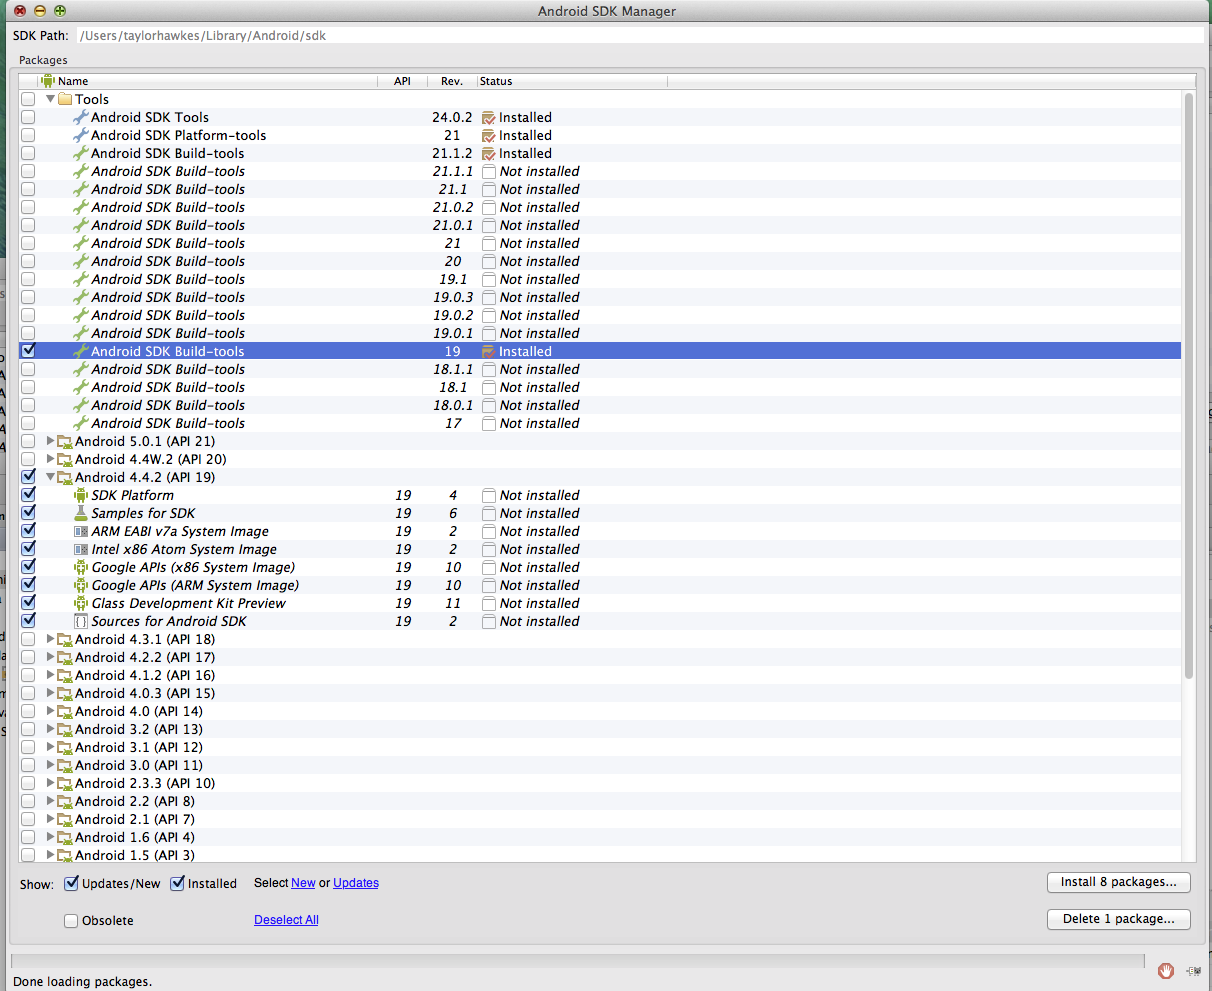
Note: Generally when using PhoneGap we are going to have to use a slightly older version of the Android SDK, this is because the PhoneGap team has to build their software off some SDK and by the time it’s ready their is a new SDK out. Currently PhoneGap uses version 19, while Android studio installs and uses version 24 by default. In the future it’s likely that both PhoneGap & Android studio will use newer versions, however they pry won’t match by default – so you will always need to install the version that PhoneGap uses. If you don’t have the correct version, PhoneGap will let you know when you to build the app with an error message like : Error: Please install Android target “android-19″.

After installing the correct SDK version/API & adding the SDK libraries to our path, we can initialize a default android template:

phonegap platform add android
Note: It’s important that we don’t try to build our app yet (we to import the app into android studio first), otherwise Android Studio will not be able to import the project properly.

Importing PhoneGap App into Android Studio & Running the App

Cool, now we just need to import the app into Android studio and run the app, this process should be pretty easy.

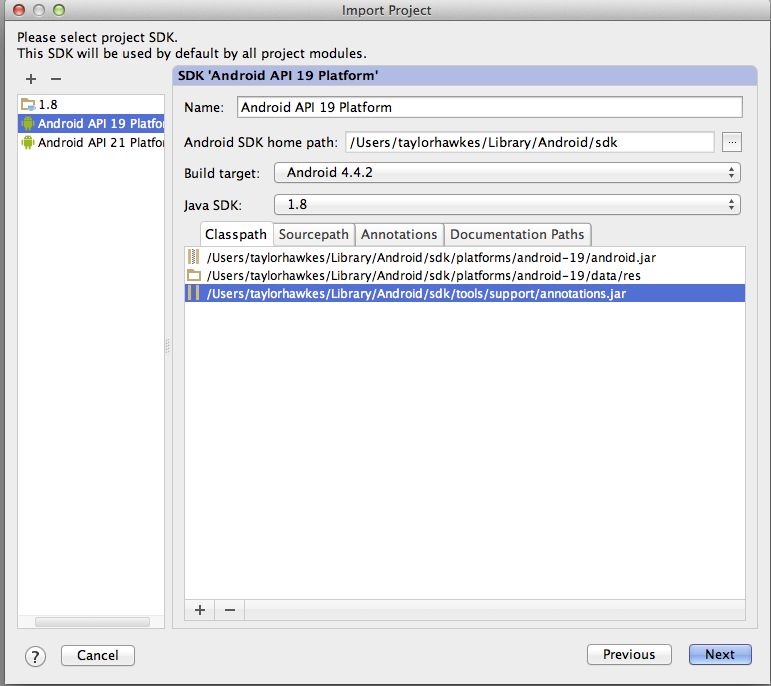
In Android Studio go to: File->Import Project -> Select the Project Folder “/Users/taylorhawkes/Desktop/helloworld” – > Click Next Until you get to the below screen and make sure you select “Android API 19 Platform” -> Then Click Next -> Finish.

Screen Shot 2015-01-13 at 1.18.12 PM

After importing the project, we will make sure everything is working by running the Android Studio Emulator.

Got to Run-> Run Android as shown below:

Screen Shot 2015-01-13 at 5.05.31 PM

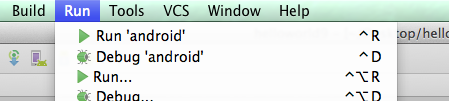
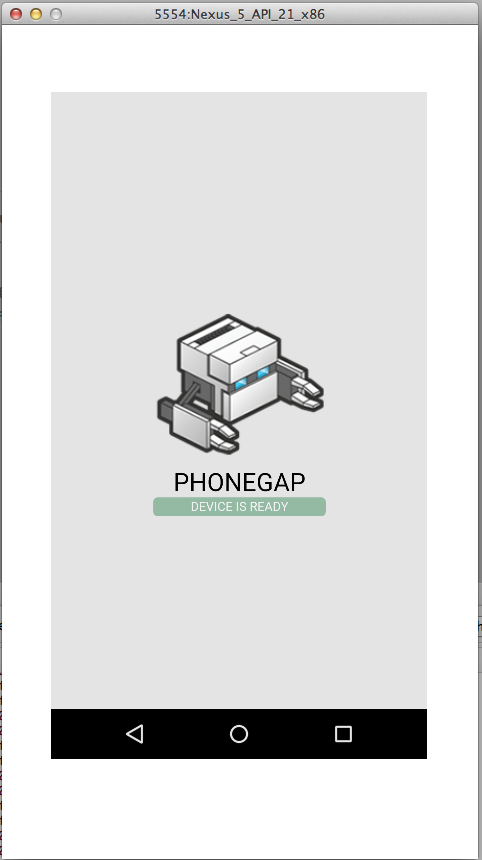
Andriod studio should fire up the emulator and you should see something like this:
Screen Shot 2015-01-13 at 5.06.45 PM

Note: A common error at this point is: ERROR: x86 emulation currently requires hardware acceleration!. Make sure you have installed the HAXM installers, follow the direction on this thread: http://stackoverflow.com/questions/26355645/error-in-launching-avd. notice that even after you install this through the “SDK Manager” you will still have run the silent_install.sh

Changing The Default app

Now for the fun part, since we got things working properly lets add our own little html/css/js App, build it and see how it looks.

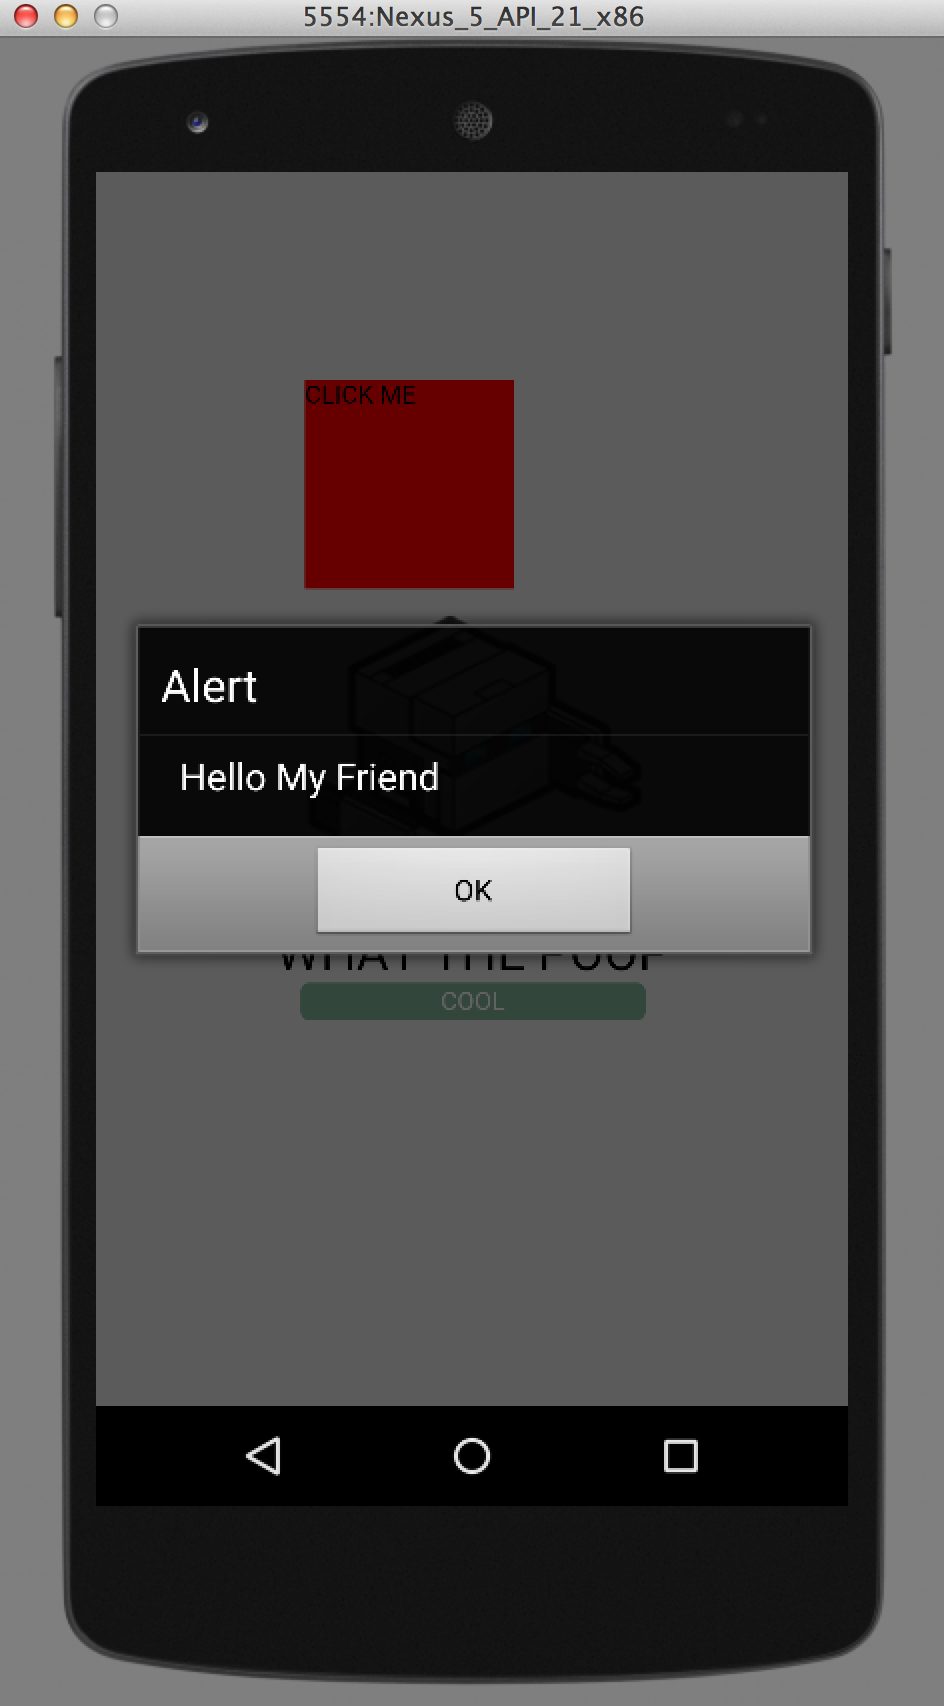
You can of course use your own html/css/js app (just like your would build a regular webpage). For a simple example, I will work from the default template already created, I will add a red box that when clicked alerts “Hello My Friend”. You can download the whole “www” folder here, or make the few small changes I outline below.

Add the below code under opening body tag “www/index.html”


<div id="red_square">Click Me</div>

Add these two lines in “www/js/index.html” (in the onDeviceReady function)

var square=document.getElementById("red_square");
square.onclick=function(){ alert("Hello My Friend"); };  

Add this css to “www/css/index.css”

#red_square{                                                                                                         
position:absolute;                                                                                                   
top:100px;
left:100px;
width:100px;
height:100px;                                                                                                        
background:red;
}

Now for the magic, we use PhoneGap to build the android app. From your ~/Desktop/helloworld/ folder run:

phonegap build
You will need to run “phonegap build” after every change you make in your html/css/js app. Make sure you don’t run this command prior to importing into Android studio, or will run into errors when trying to run your App.

Then, back in Android studio lets run our app just like we did before: Run-> Run. This time we can see the changes we made in our app, try clicking the red button and see what happens :-).

Screen Shot 2015-01-15 at 3.36.44 PM

Pushing your App to a real device

Now we will push our app to a real android device. First we need to do a few thing to prepare our android device for the app.

a. Plugin your device.
b. Under you android device go to settings -> General – > Security and ensure that “Unknown sources” is checked under “Device Administration”.
c. Under settings -> General – > Developer options check: “USB Debugging”

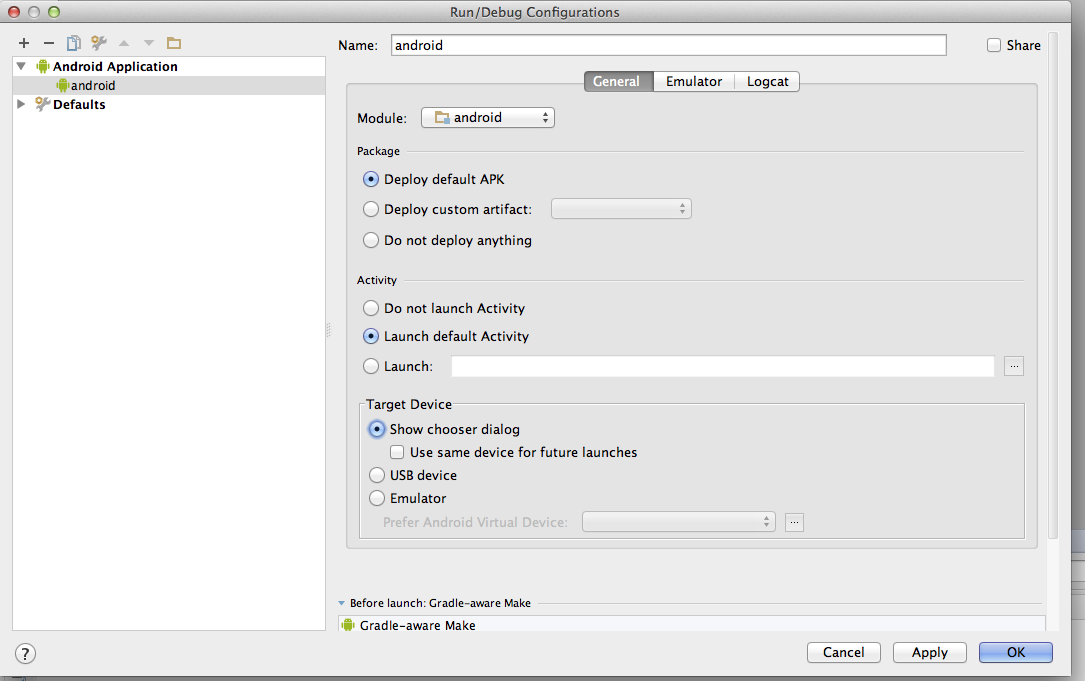
Change Run Configuration in Android Studio
Go to Run->Edit Configuration -> and select “Show chooser dialog” under target device , then apply and hit ok.

Screen Shot 2015-01-13 at 5.23.05 PM

Push to device by going to Run -> Run -> Select your device and hit ok:
Screen Shot 2015-01-13 at 5.26.25 PM

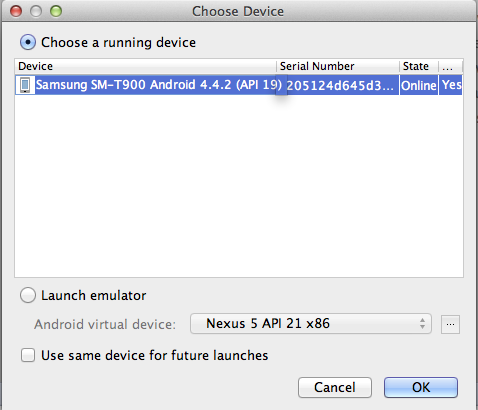
Congrats!!! You should now see your app launch on your device.

If you looking for the RingRoost mobile app you can find more about connecting your mobile device to RingRoost here.

Thanks to these various articles:
http://www.panopticdev.com/blog2014/phonegap-mac-osx-setup-configuration-android-ios/
http://phonegap.com/install/
http://stackoverflow.com/questions/24931155/cordova-3-5-0-install-error-please-install-android-target-19
http://stackoverflow.com/questions/24688345/cordova-wants-android-19-i-have-android-20
http://www.tricedesigns.com/2013/05/16/phonegap-android-studio/
http://www.codenutz.com/getting-started-phonegap-android-studio/
http://stackoverflow.com/questions/26355645/error-in-launching-avd
http://developer.android.com/tools/device.html
http://www.codenutz.com/getting-started-phonegap-android-studio/

Asterisk – ODBC + CDR + Mysql on Ubuntu

We recently switched from using cdr_mysql on Asterisk (now depreciated) to crd_obdc + cdr_adaptive_odbc to store CDR logs to MySQL. Below is the process for doing so.

Install needed libraries.

1. apt-get install libmyodbc unixodbc-bin
2. sudo apt-get install unixODBC unixODBC-dev

Lookup socket:

mysqladmin -u root -p version

Update /etc/odbc.ini – set socket to location found in above command:

[MySQL-ivr_test]
Description     = ivr_test MySQL ODBC
Driver          = MySQL
Socket          = /var/run/mysqld/mysqld.sock
Server          = localhost
User            = root
Password        = password
Port            = 3306
Database        = ivr_test
Option          = 3

Find you driver & setup paths:

find / -name 'lib*odbc*.so'

and then update /etc/odbcinst.ini (look for the two files “libmyodbc.so” & “libodbcmyS.so” from the above command and then set the Driver, Setup fields correspondingly):

[MySQL]
Description = ODBC for MySQL
Driver = /usr/lib/x86_64-linux-gnu/odbc/libmyodbc.so
Setup = /usr/lib/x86_64-linux-gnu/odbc/libodbcmyS.so
FileUsage = 1

Install the ODBC driver:

odbcinst -i -d -f /etc/odbcinst.ini

Install your system DSN:

odbcinst -i -s -l -f /etc/odbc.ini

Test:

odbcinst -s -q

Try and connect:

isql -v MySQL-ivr_test MYSQLUSER MYSQLUSERPASSWORD

Almost there, now on the asterisk side of things:

Update /etc/asterisk/res_odbc.conf

[MySQL-ivr_test]                                                                                                      
enabled =&gt; yes                                                                                                        
dsn =&gt; MySQL-ivr_test                                                                                                 
username =&gt; username                                                                                                      
password =&gt; paswordhere                                                                                           
preconnect =&gt; yes 

Update /etc/asterisk/cdr_adaptive_odbc.conf

[first]                                                                                                          
connection=MySQL-ivr_test                                                                                             
table=users_call_logs                                                                                                 
alias start =&gt; calldate


See also IVR set up in Asterisk here.

Thanks to:
http://www.kaffeetalk.de/how-to-setup-and-configure-mysql-with-unixodbc-under-ubuntu-14-04/
http://nerdvittles.com/?p=604
http://www.asteriskdocs.org/en/3rd_Edition/asterisk-book-html-chunk/installing_configuring_odbc.html

Business Phone Systems – Doing it Yourself

It was not always the case that trying to set up a phone system by yourself is worth the time, I mean, you got to stick with your core businesses. At RingRoost our goal it to make setting up your phone system too fast, too cheap and too easy to NOT do it by yourself. In the time it takes you to get off the call with a sales man at some slow moving telecommunications company, you could have already set up a working phone system. If your ready to get started setting up your phone system, checkout our guide to setting up an office phone system. Otherwise keep reading…

Why setting up your own phone system is a good idea.

1. Control & Flexibility
Doing it yourself puts you in complete control of your phone system. This means, you will be able to add features to your phone system that you would never get with an out of the box solutions. Features like integrating your business contacts, so your system can automatically know who is calling and pull in customer information, features like call queueing, multi line ringing, conference calling and multiple personal extensions.

2. Price
This is where you start to see the huge saving start to add up, instead of paying ridiculous prices like $30/mo per user. You can pay by your phone usage, and not worry about having to pay more when get a new hire and need a phone for them.

3. Speed
Most businesses (especially startup businesses) know that getting stuff done fast is important, you can’t wait around a few months to get a phone system installed,if you setup your own phone system you won’t have to wait around for someone to come by and do it for you.

Many businesses are worried that doing it themselves will be to hard or take to up to much time. The RingRoost PBX builder technology is developed to allow anyone who can user a computer to do it themselves, and the best part is if you ever run into any problems, we are here to help. If you want to see more about RingRoost, checkout this introduction video to RingRoost.