Below I explain how to get set up and run a “Hello World” Android application using Android Studio and PhoneGap. The process goes like this: First will write a HTML/CSS/Javascript, then we will use PhoneGap to convert that html app into a Java/Android app, then we will use Android Studio to compile and run the Java/Android app in simulator, finally I will show how to use Android studio to push your app to an actual Android Device.
Installing Android Studio (And Android SDK)
Android studio helps us with a lot, we will use Android Studio to: Install Android Libraries (also know as SDK), Run the android emulator, push our app to a android device.
a.) Download Android studio from: http://developer.android.com/sdk/index.html
b.) Run the .dmg and walk through installation (leave all the default settings, & accepts the licenses etc…)
c.) Open Android Studio and create a w project (just use default project settings – we won’t even use this)
Download and install PhoneGap
1. Installing Node.js & Apache Ant (PhoneGap Dependencies)
brew update
brew install node
brew install ant
2. Install PhoneGap
sudo npm install -g phonegap
Creating Our PhoneGap App
We will use PhoneGap to create a default html/css/javascript app.
cd ~/Desktop/
phonegap create helloworld com.world.hello HelloPrettyWorld
cd ~/Desktop/helloworld/
You will now notice a “www” folder in your current directory, this is our default html/css app, we will change this shortly, but we need to do a few more things first.
Next we need to use PhoneGap compile our HTML/CSS/JS app into Java app. This requires just the one tricky step of lettings PhoneGap know where the Android SDK Libraries live. We have already downloaded the SDK, when we downloaded Android Studio, now we just need to know it’s path.
To find your SDK path:
Open Android Studio -> On the Top Bar go to “Tools” -> “Android” -> “SDK Manager”
You should then see your SDK Path, mine is: /Users/taylorhawkes/Library/Android/sdk

You then need to set the “ANDROID_HOME” variable that PhoneGap Uses, run the below command (CHANGE TO YOUR PATH, NOT MINE):
export ANDROID_HOME=/Users/taylorhawkes/Library/Android/sdk
export PATH=${PATH}:$ANDROID_HOME/tools:$ANDROID_HOME/platform-tools
To permanently add this variable, append the above command to your “~/.bash_profile” file.
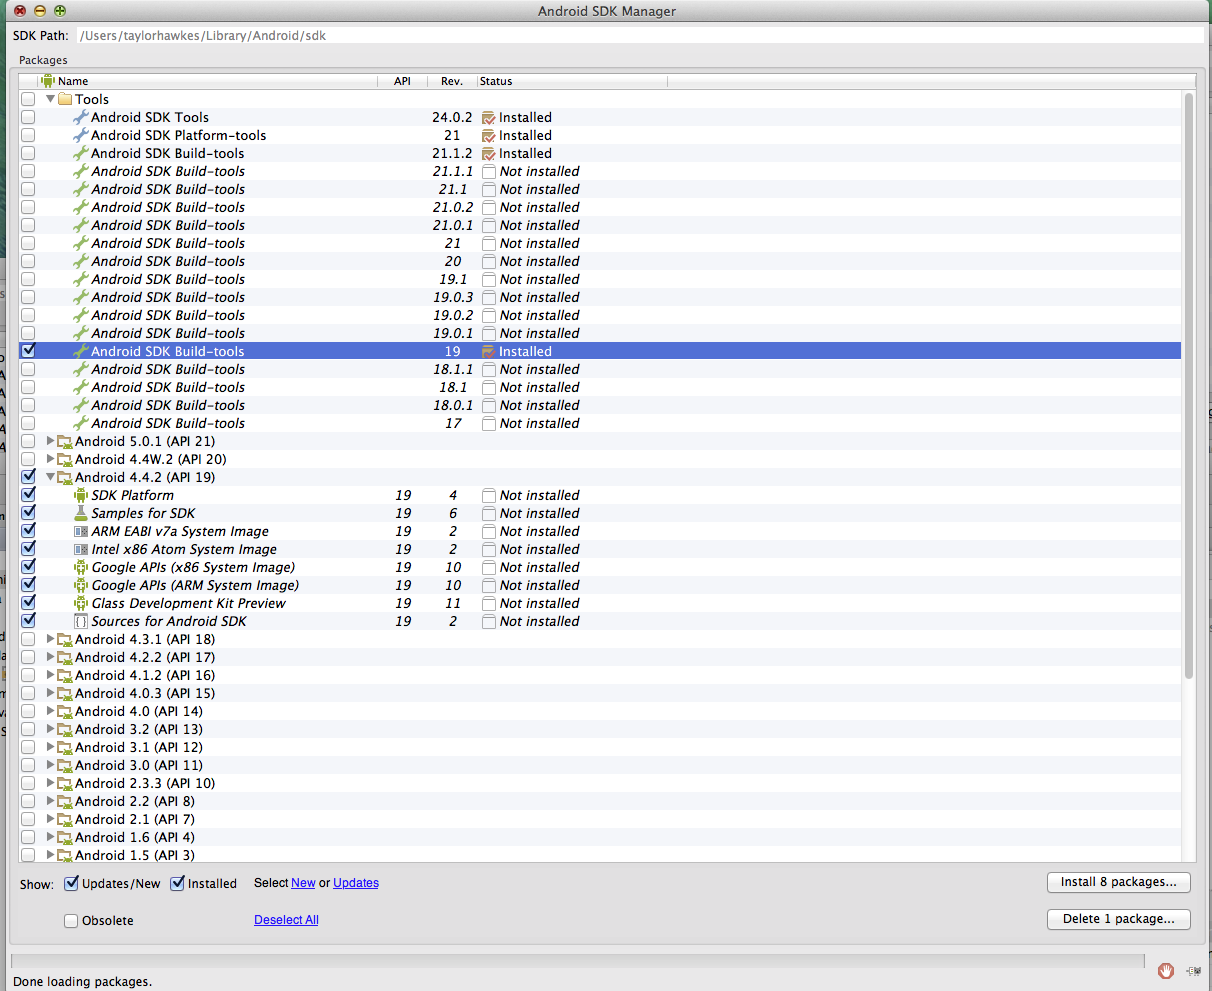
Now Under the Android Studio SDK Manager, select version 19 of the SDK build tools Android 4.4.2(API 19) and install the packages.
After installing the correct SDK version/API & adding the SDK libraries to our path, we can initialize a default android template:
phonegap platform add android
Importing PhoneGap App into Android Studio & Running the App
Cool, now we just need to import the app into Android studio and run the app, this process should be pretty easy.
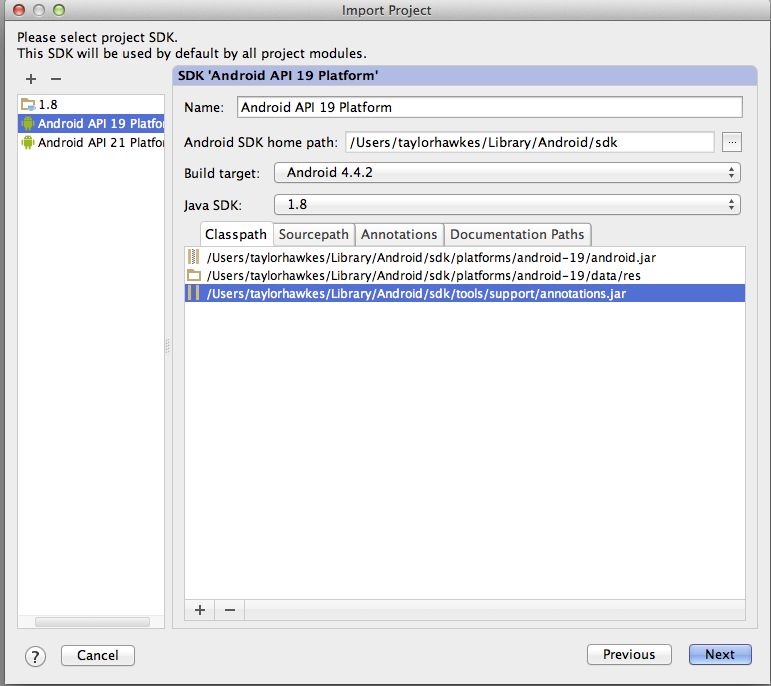
In Android Studio go to: File->Import Project -> Select the Project Folder “/Users/taylorhawkes/Desktop/helloworld” – > Click Next Until you get to the below screen and make sure you select “Android API 19 Platform” -> Then Click Next -> Finish.
After importing the project, we will make sure everything is working by running the Android Studio Emulator.
Got to Run-> Run Android as shown below:
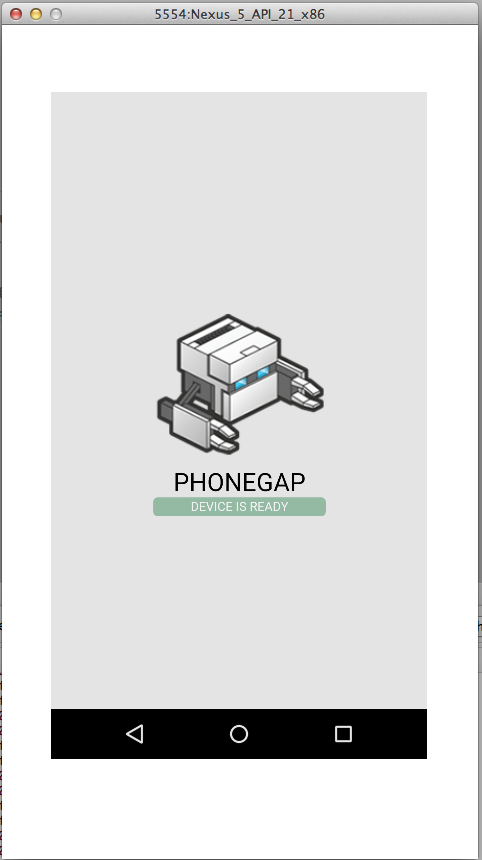
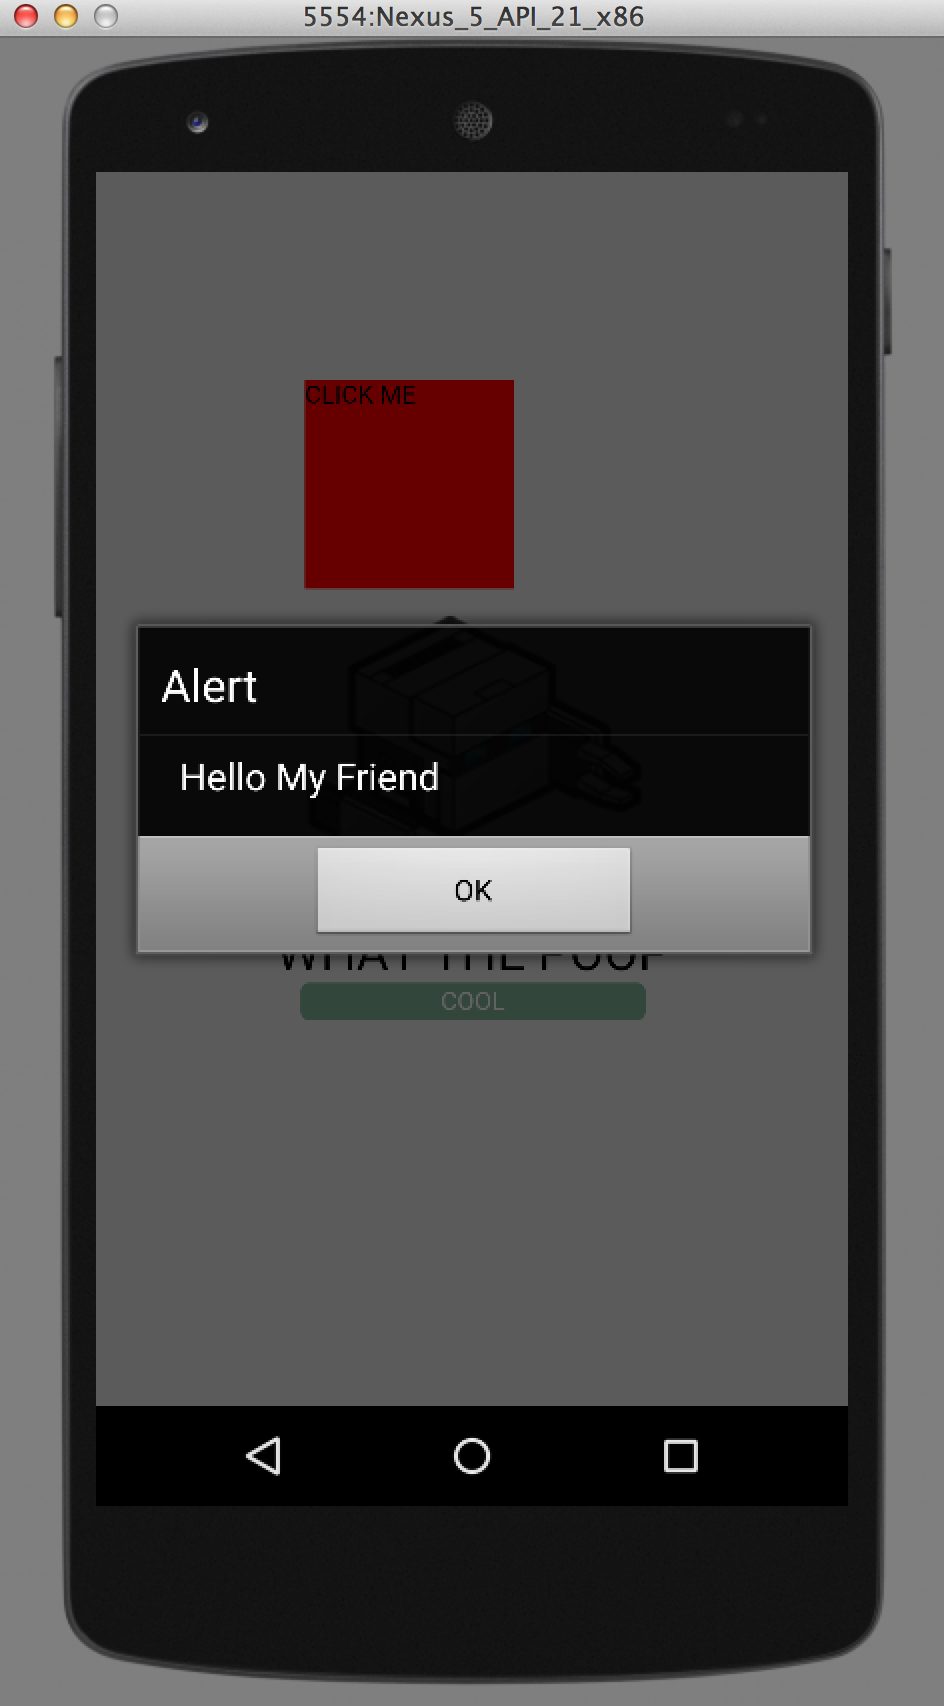
Andriod studio should fire up the emulator and you should see something like this:
Changing The Default app
Now for the fun part, since we got things working properly lets add our own little html/css/js App, build it and see how it looks.
You can of course use your own html/css/js app (just like your would build a regular webpage). For a simple example, I will work from the default template already created, I will add a red box that when clicked alerts “Hello My Friend”. You can download the whole “www” folder here, or make the few small changes I outline below.
Add the below code under opening body tag “www/index.html”
<div id="red_square">Click Me</div>
Add these two lines in “www/js/index.html” (in the onDeviceReady function)
var square=document.getElementById("red_square");
square.onclick=function(){ alert("Hello My Friend"); };
Add this css to “www/css/index.css”
#red_square{
position:absolute;
top:100px;
left:100px;
width:100px;
height:100px;
background:red;
}
Now for the magic, we use PhoneGap to build the android app. From your ~/Desktop/helloworld/ folder run:
phonegap build
Then, back in Android studio lets run our app just like we did before: Run-> Run. This time we can see the changes we made in our app, try clicking the red button and see what happens :-).
Pushing your App to a real device
Now we will push our app to a real android device. First we need to do a few thing to prepare our android device for the app.
a. Plugin your device.
b. Under you android device go to settings -> General – > Security and ensure that “Unknown sources” is checked under “Device Administration”.
c. Under settings -> General – > Developer options check: “USB Debugging”
Change Run Configuration in Android Studio
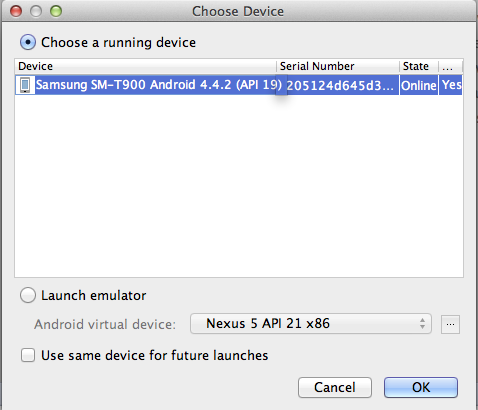
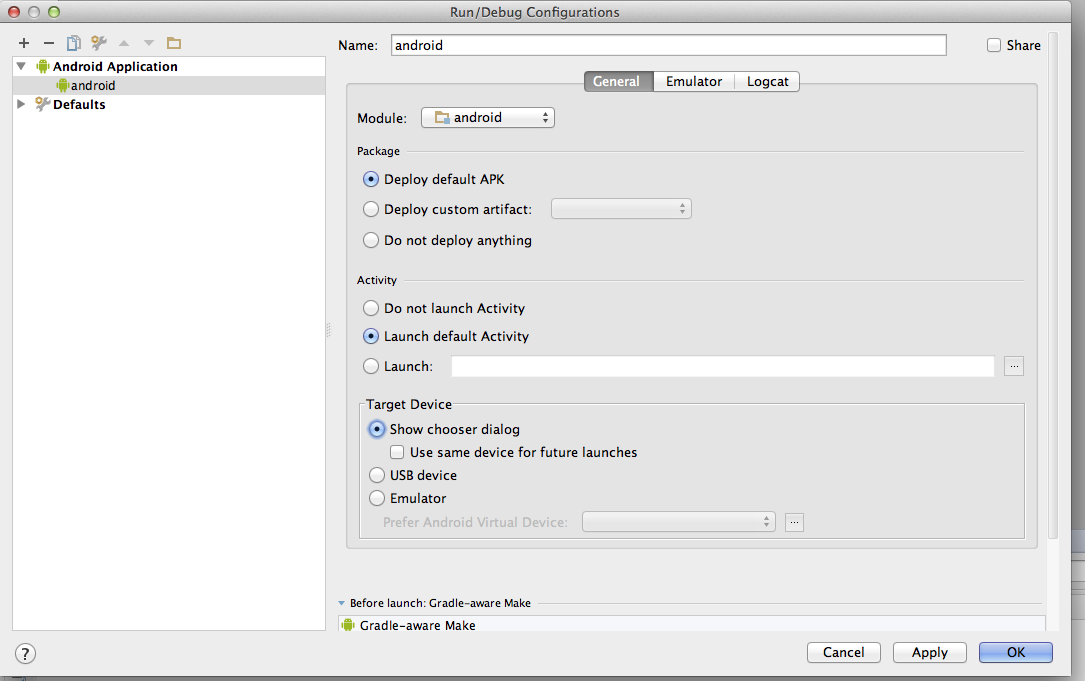
Go to Run->Edit Configuration -> and select “Show chooser dialog” under target device , then apply and hit ok.
Push to device by going to Run -> Run -> Select your device and hit ok:
Congrats!!! You should now see your app launch on your device.
If you looking for the RingRoost mobile app you can find more about connecting your mobile device to RingRoost here.
Thanks to these various articles:
http://www.panopticdev.com/blog2014/phonegap-mac-osx-setup-configuration-android-ios/
http://phonegap.com/install/
http://stackoverflow.com/questions/24931155/cordova-3-5-0-install-error-please-install-android-target-19
http://stackoverflow.com/questions/24688345/cordova-wants-android-19-i-have-android-20
http://www.tricedesigns.com/2013/05/16/phonegap-android-studio/
http://www.codenutz.com/getting-started-phonegap-android-studio/
http://stackoverflow.com/questions/26355645/error-in-launching-avd
http://developer.android.com/tools/device.html
http://www.codenutz.com/getting-started-phonegap-android-studio/




Taylor, Appreciate your efforts in putting out this information …
I’m getting a suggestion (when carrying out your steps reaching “Import Project”) to migrate the project to Gradle- is there some easy way to do this or will I have to dig into the nitty-gritty of Ant/Maven and Gradle ?
I believe that it needs to find the build.gradle file which is under platforms/android. I’m running issues building after I did that with regards to the gradle version.
Minor correction that might trip up noobs:
On Mac OS X you need to edit “~/.bash_profile” not “~./bash_profile” to set up your ANDROID_HOME and PATH
Yes, fixed that – thanks.
Nice article Taylor! I was looking through the cordova docs and couldn’t make heads or tails as to where to begin and this article set me on track. I encountered an issue trying to run the project ‘run android’ with Android SDK 19 platform while going through the steps above. It was complaining about the android.webkit.ClientCertRequest. I found info on this problem in SO here Turned out that phonegap is now using a more updated version of the Android SDK so I was able to use Android SDK 21 and successfully run this. Thanks!!
First off, I’m following your example on a PC. The steps to follow are the same as far as I can tell, but I keep getting an error:
Error:Android Source Generator: [CordovaLib] Android SDK is not specified
when I do the ‘run android’ emulator step after importing the project. Looking up that error on StackOverflow and trying out the few solutions offered, I’m still getting the same error. Seems to be more people asking the question than there are answers. Just an observation.
Hi Taylor,
Thanks for your well written guide. I have installed the first app on my Android well. There was minor issues:
1) Android API 19 was not available after installation of the package. I need to select the API 19 under “View” -> “Open Module Settings”. I am using Android Studio 1.3.2
2) The next step under “Run” -> “Run Android”, the program cannot run and there were a number of errors. I had to change back to SDK Android 23 then it works.
Thanks for your write up!!
Great article with hard to find information when using Cordva and Android Studio. Thanks for pulling this together.
I followed your directions closely accept their is no file import option. Instead the home page has an Import Project option which I selected. Everything happened as you outlined. However, when I finished and selected run android, I received an error: Unable to locate adb within SDK. Any ideas on what I should do?
Thanks for your help!
Howard
Problem solved. For others that may have a previous PATH for the SDK, when I got to the screen where I selected “Android API 19 Platform”, I also had to change the sdk PATH to my new path.