Step 3 -Getting acquainted with the RingRoost PBX builder
Under your dashboard create another PBX named "My Office PBX" (or whatever name you want for your office phone system), then click "edit". You will be taken into the PBX builder, this is where you will build out your PBX.
I will just briefly explain how the RingRoost PBX builder works. Basically, there are certain "Call Controls" on the left that you drag and drop onto PBX. You then connect the call controls together, in order to determine how the call flow will work in your PBX. Each call control has various properties that you can set in order to change the PBX's functionaility - this might sound confusing, but I promise it really is not.
Getting acquainted
At this point lets take a second just to acquainted with the PBX builder by setting up a simple voice menu system (sometimes it helps to start really simple).
So we will start by dragging and dropping an "Answer Call" control onto our PBX. You will notice that the control opens up and has a drop down with all the numbers that you have available in your RingRoost account, select the number you want to be handled by this control.
Next drag and drop a "Menu" control onto your board and then connect it to the "Answer Call" control. In the textbox that appears type: "Press 1 for sales. Press 2 for tech support". Your PBX should now look something like this:
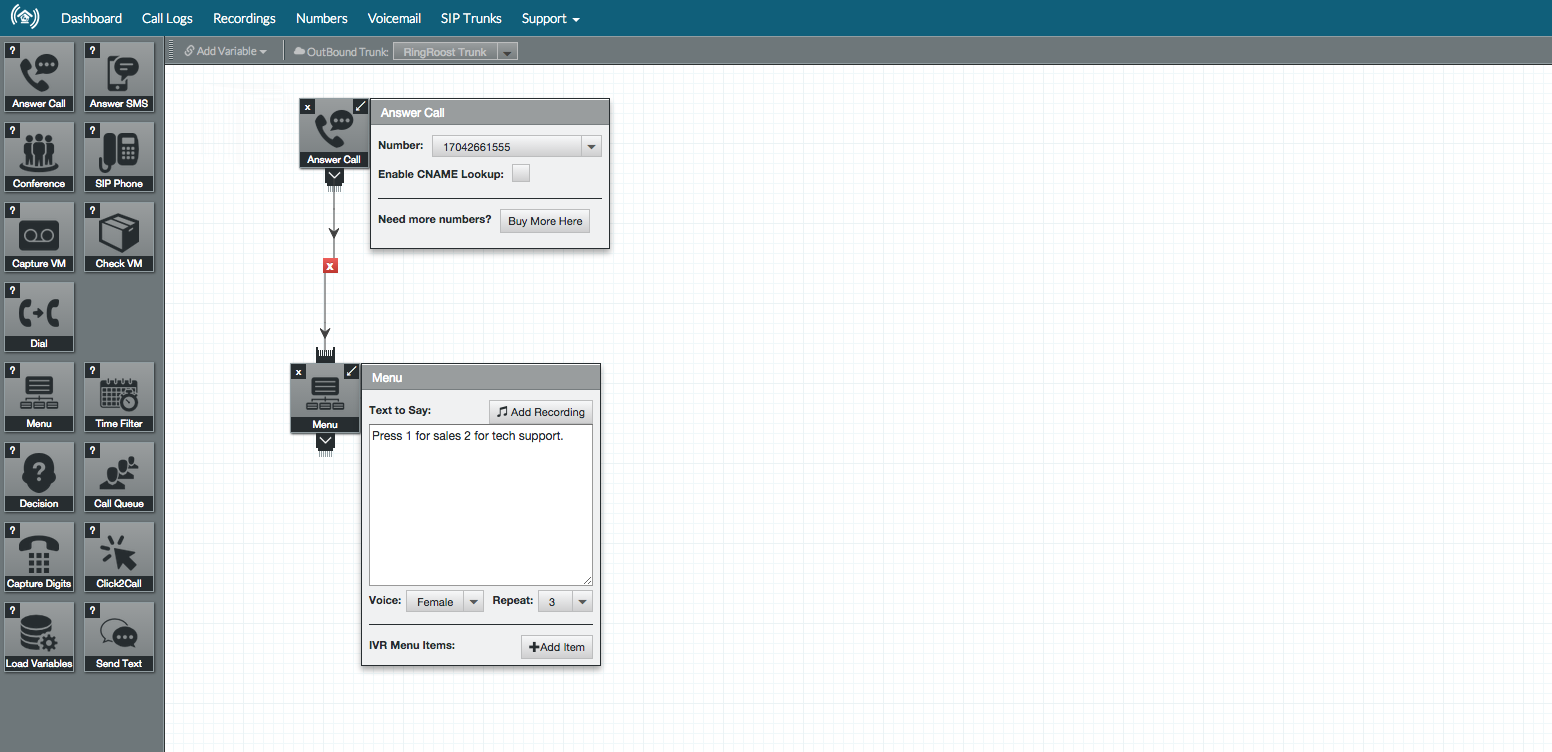
SAVE YOUR PBX/IVR (orange button top right) and then call the phone number that you select in your "Answer Call" control.
You should hear a computerized voice say whatever you typed in the "Menu" control. If you do not hear that voice, something has gone wrong.(make sure you saved your PBX).
Note: We will come back to the "Menu Control" and show how to setup an interactive voice response later in step 7, this step was purely help get you familiar with how the RingRoost PBX builder works.
- Resources
- User Manual
- Forums
- Help Videos
- Blog
- FAQ's
- Office Phone System Settup
- PBX Setup
- SIP Phone System